Tag Archives: Recipe

recipe goodness :: baked eggs in spicy tomato sauce

Baked Eggs in Spicy Tomato SauceIf you know me well, you know how much I love to #putaneggonit. Pretty much any dish can be made better with a gooey yolk coating whatever was lucky enough to be blessed with it. So with a container of grandma’s leftover sauce in the freezer and a new carton of eggs in the fridge, I added one additional ingredient to make this one-pan dinner a keeper: spice. You could call this your lazy evening meal, but I bet it would impress any dinner guest too.

Baked Eggs in Spicy Tomato Sauce
Serves 2-3

32 oz Grandma DiLaura’s Tomato Sauce
2 fresh chorizo sausage links {optional — meat version}
1-2 teaspoons red chili flakes {optional — add instead of chorizo for vegetarian}
1 tablespoon olive oil {if using chili flakes}
1 large egg per person

  1. Preheat oven to 450 degrees
  2. If making a meat version: remove chorizo from casings and break up in little pieces. Heat pan to medium heat on stove and cook chorizo until no longer raw, 2-3 minutes. Drain excess oil from pan.
  3. If making vegetarian version: heat a tablespoon of olive oil in pan on medium heat and add chili flakes. Cook 1 minute to release the fragrance of the chili flakes.
  4. Add sauce to a small baking dish with enough volume to fit 40oz+ so sauce doesn’t overflow while cooking. Stir in chorizo {meat version} or chili flakes {vegetarian version} and put dish in preheated oven for 20 minutes.
  5. Once sauce starts to get a deep red with brown, bubbly edges, remove the pan from the oven. Crack eggs into small separate bowls for each one. Gently pour each egg on top of the sauce, spacing each one out. They’ll start to run and look like floating continents — that’s the beauty of it!
  6. Place pan back in the oven and cook for about 5 minutes or until the white is firm when touched with a utensil and no longer raw.
  7. Remove from the oven, allow to cool slightly and serve in a bowl with a spoon and crusty bread to sop up all the goodness. Or over rice!
A Rainy Sunday Meal

A Rainy Sunday Meal

#putaneggonit
Cumin & Dill Dijon Egg Salad with Radish Sprouts
Egg on Egg Salad {Introducing Bottarga}
Secret DiLaura Family Frittata with Sweet Italian Sausage
How To Cook The Perfect Sunny Side-Up Egg
How to Cook the Perfect 8.5 Minute Egg
How to Cook the Perfect Poached Egg {with Ramp Butter!}
Inside-Out Scotch Eggs w/ Ground Lamb, Harissa Yolk & Panko Gremolata
Julia Child’s Rolled French Omelet


Leave a comment

Filed under @home {recipes to love}

recipe goodness :: really crisp roasted sweet potatoes with gochujang

Roasted Sweet Potatoes with Gochujang


It’s been a long time since I’ve put pen to paper, but it’s about time the blog hiatus comes to an end. The other night, with no particularly inspired meal plan in my mind, I made something blog-worthy. The kind of dish that syncs beautifully with one central ingredient and several well-chosen partners.

I had a sweet potato from the farmers’ market that had been sitting on the shelf for several weeks and was starting to stare back at me with a few eyes. I remembered a ridiculously good crispy roasted potato recipe {courtesy of Nigella Lawson} I had made for New Year’s Eve and wondered if I could apply the same technique to a more tender sweet potato with similar results. Granted those were roasted in duck fat, but the secret sauce was really in the technique. It’s good to be back sharing — enjoy!

Sliced and ready to parboil

Crisp Roasted Sweet Potatoes with Gochujang
1 large sweet potato, scrubbed
olive oil for drizzling
1 teaspoon coarse gray salt
1 teaspoon Izak N. 37 (or a blend of sweet chili pepper, cumin, garlic powder)
Gochujang for serving

  1. Scrub the potato and slice it into 1/4-inch thick circles. Because this guy was a fatty, I quartered each round.
  2. Preheat dry baking sheet in 450 degree oven
  3. Parboil the potatoes for about 5 minutes to warm them up and start breaking down the starch — this will help them start crisping as soon as they hit the hot oven.
  4. Once tender enough that a paring knife would easily pierce the potato {about 5 minutes}, drain the goods and throw them back into the empty pot. Add a generous drizzle of olive oil, coarse gray salt and one of my favorite sweet chili spices, Izak N.37 from La Boîte {or mix equal amounts 1/3 tsp each of sweet chili pepper, cumin, garlic powder}.
  5. And now the fun part. Put the lid of the pot on and hold tightly, shaking vigorously to take out all work week frustrations. The process of doing this roughs up the surface, which will allow for more surface area to release the moisture trapped in a potato and also creates more edges that will get good and crisp during roasting. Win, win.
  6. Once everything is nice and beat up, pull the preheated sheet pan out of the oven and drizzle with 1-2 tablespoons of oil and swirl around to coat the pan.
  7. Toss the coated potatoes on the pan {be careful as the oil may splatter} and throw in the oven for 10 minutes.
  8. Rotate the pan 180 degrees after 10 minutes and roast for another 10 minutes.
  9. Remove pan from the oven and use tongs or a spatula to flip each potato over to roast the other side. Toss the pan back in the oven for another 10 minutes {less if getting too dark too or more if desired darkness is taking longer}.
  10. Remove from the oven and sprinkle with a nice flake salt — I love Jacobsen Salt — and serve with a side of Korean Gochujang {a tangy flavor combination of vinegar and fermented chile paste} or your favorite dipping condiment.

Roasted sweet potatoes

Roasted Sweet Potatoes with Gochujang

Some Like it Hot:
Homemade Spicy Pickled Carrots
Homemade Spicy Carrot Kimchi! & Apple Chutney!
Spicy Tomato-Meyer Lemon Stewed Chick Peas
Some Like it HOT Pollo alla Diavola
Lime-Red Chili Grilled Swordfish


1 Comment

Filed under @home {recipes to love}

The Way to a Girl’s Heart: Beer-Bartered Trout

Prized Trout

Prized Trout

So this is how the story goes: girl buys new shiny grill, shiny grill needs its maiden voyage, girl craves something that can’t be bought — a friendly barter is made, as is a meal worthy of brag.

I look forward to each Sunday when I roll out of bed, hair disheveled, tote bags hung on the crook of my elbow, and meander a few blocks to the farmers’ market. The only thing on my agenda is to say hi to my friends, the farmers — everyone should  be friends with local farmers, they wake up at 4am to feed you. That’s a good friend.

But this particular day was different. I was hanging out with Keith at Grazin’ Angus Acres — eyeing their grass-fed beef and stocking up on  $10 / dozen golden eggs. Conversation turns to the things that fill empty hours — I was telling him about my new  brewing project {remember: brew beer, make friends} and he was telling me about his day of fishing for stream trout that was planned for Monday. Mmmm, beer. Mmmm, fresh trout. Boom: light bulb. “What would you say to a friendly barter?” he proposes. The genius plan: meet back at the market the following Sunday with two tradable treasures that would be mutually appreciated.

A Fine Finned Friend

A Fine Finned Friend

And so came home a fine finned friend — a beaut, as they say.

Grilled Stream Trout

1 whole trout, gutted and cleaned
2 green garlic stems, chopped
1 lemon sliced
4-5 pats of butter
salt and pepper to taste

With nothing more than a little butter, green garlic and lemon stuffed inside and blanketing the fiddy, I wrapped this guy in a foil pouch, threw him on the grill at a steady 350° {yes, the new grill has a gauge!} and cooked him until his clear-as-day eyes turned white — about 20 minutes.

Poach Pouch

Poach Pouch

Voila — maiden voyage success and a meal to remeber!

Grilled Trout

Grilled Trout

Oh, and the best part? A dare to eat the eye. I rarely turn away from a good challenge. Thank goodness for bread and a cold beer.

Eye see you

Eye see you

3 Comments

Filed under @home {recipes to love}, Do This!

recipe goodness :: the best focaccia i’ve ever had, toppings optional

The Best Focaccia I've Ever Had

Take a bite

I took a breadmaking class with Matthew Tilden of SCRATCHbread a few years ago and learned what is quite possibly the best focaccia recipe I’ve ever had. The inside has a spongy spring that makes focaccia the type of bread you want to sop up whatever needs sopping. But the difference in his recipe is that the lovely springy inside is enrobed in a crackly crust that seems to be missing from too many other oily focaccia phantoms.

I love when focaccia is permeated with other delicious treasures. Inspired by the suitcase of meyer lemons I just toted back from San Fran and a meyer lemon focaccia recipe we just published on Food52, I decided a weekend project was calling my name. This SCRATCHbread recipe was asking for some sweet lemon love.

Thinly slice, sprinkle with coarse salt and let drain to remove some moisture.

Thinly slice, sprinkle with coarse salt and let drain to remove some moisture.

SCRATCHbread Focaccia (3-3.5 hours total; 3 cake pans)

2 lbs. – all purpose Unbleached Unbromated Flour (preferably organic)
8 oz – “oo” Fancy Durum Flour
1.5 lbs. Water (warm 90-100 degrees)
1 oz – compressed “brick” yeast
1 oz – Sea Salt (coarse grey)
1 TBS – Honey
Olive Oil (lots!)
Toppings — whatever your heart desires (in this recipe I used one meyer lemon, one red onion, fresh thyme, whole grain mustard, cracked black pepper and coarse salt)

Prepare yeast, honey and ground salt

Prepare yeast, honey and ground salt

  1. 1. Mix and dissolve yeast, honey & salt (crush salt with mortar and pestle if using coarse grains) with warm water. Set Aside. Make sure water is warm, not hot or you will kill the yeast.

Focaccia dough steps

  1. In a large bowl (or mixer, but we used our hands) add flour and then water mixture, incorporate into shaggy mass.
    1. If using a mixer, continue mixing with dough hook until dough comes together and begins pulling away from the sides, about 1.5 minutes. Add about 2T of olive oil to lather and let it mix in for about 20 seconds.
    2. If using your hands, scrape dough onto a clean surface and practice the slam and flip method! Take the dough, slam it down hard, it will spread out, take one end and fold it over the other end, grab the dough at the end closest to you and slam it down again (it will be sticky and that’s ok). Repeat this process for 1-2 minutes until the dough comes together and the gluten has some toughness to it (if you were to pull on the dough it fights back.) Form into a smooth round ball and pour about 2T of olive oil over the dough ball, massaging all over.
  2. Pour ~2T of olive oil in a clean bowl to “grease” sides. Put the olive oil lathered dough in bowl and cover with saran wrap or a clean towel. Let rise until doubled, about 1 hr 30 minutes in an 80-90 degree environment (you can put near a heater of turn your oven on and set bowl on a chair near the oven vent.)
  3. Once dough is doubled in size and super fluffy, pour onto a clean dry surface and fold over itself into a tight mass. Begin beating the living crap out of the dough. Punch it, elbow it, release all frustrations as you are basically giving it life by pulverizing it. So consider this a good deed to the dough. You can repeat the slam and flip method. Once the mass has had its way, let the beaten mass rest for about 15 minutes. Before dividing into desired shapes/pans. (We used a knife to cut this amount into thirds and made 3 pans.)
  4. I recommend a heavy non-stick cake pan (square or round) because you can take advantage of the rising capabilities and add more toppings, which is always nice.
  5. Coat the pan in olive oil and add third of dough to each pan. Massage with your finger tips, using a “piano finger motion” to form crevasses and spread the dough. Pour MORE olive oil over the dough to coat and collect in yummy olive oil pools in the crevasses. This is sort of the secret for super sexy focaccia goodness. Let the dough rest for 30 minutes in the pan.
  6. Piano finger-in the toppings

    Left: Meyer lemon-thyme. Right: Red onion-meyer lemon-coarse mustard

    You will notice after about 30 minutes, the dough has taken a fluffier approach to its existence and at that point you add the toppings you desire – get creative, but here are a few suggestions! His secret was the coarse black pepper (gave it a really good bite!) And very coarse salt (for that salty goodness) If you use onion, cut them up earlier and toss with coarse salt to remove some of the moisture – toppings with moisture can prevent the focaccia from crisping nicely. I also like to do different combinations in different pans to have lots of options.

    1. Rosemary, grey salt (coarse), more olive oil!
    2. Thinly sliced meyer lemon, red onion quarters, fresh thyme, coarse grey salt, more olive oil!
    3. Crushed garlic, rosemary, thyme, coarsely ground black pepper & salt, more OO
    4. Whole grain mustard, speck, coarsely ground black pepper and salt, more OO
  7. Add your toppings and MORE OLIVE OIL!! Massage into the dough, again using the piano finger method. This will get the flavors and ingredients mixed in and attached nice and good to the dough. Anything that might burn or turn bitter should be added after you take out of the oven (fresh basil, lemon zest, etc.)
  8. Really make a point to pool the olive oil, as this will provide a very moist rich dough once cooked as well as give you the desired crust considering you don’t have a seriously hot wood burning oven.
  9. Bake 425 degrees for about 35-50 minutes (mine took 35), rotating half way. Make sure to take it to a really nice dark golden brown. It’s ok if the toppings start to slightly char – adds to the flavor! When done, immediately and CAREFULLY remove the hot sexy bread mass onto a cooling rack from the pan (pull it out with a knife or fork on one of the sides) so that the crust will become crusty! Let it cool to room temperature so you don’t burn your mouth and let the moisture set. Fight back the crowds.
Crispy Focaccia Goodness

Crispy Focaccia Goodness

2 Comments

Filed under @home {recipes to love}

recipe goodness :: ardith mae fennel & goat ragout

Ardith Mae Goat Ragout

Ardith Mae Goat Ragout

Like goat cheese? Then you should keep reading. For some reason goat meat is not a commonly consumed fork and knife option on American dinner plates — but we sure do love goat cheese. But you can’t enjoy the goat cheese without the goat, and in order to have a thriving goat dairy you need both females and males. And since males can’t produce milk, they are virtually useless after they’ve done their job creating a family — so where does all that goat meat go? Never really thought about it much did you? I’m pretty sure it’s not at your local grocery store.

You may be surprised to learn that goat is the most widely consumed meat in the world. The flavor of goat is delicate and grassy, and in my option, almost sweet. So when Shereen, the fabulous farmer behind Ardith Mae Goat Cheeseoffered to send me home with a few packages of sweet and spicy ground goat, I jumped at the chance to try something that had previously never entered my freezer.

Armed with fresh fennel, carrots, onion and celery from the farmer’s market, I decided to chuck it all in a pot, simmer it with some diced tomatoes and create a goat ragout. The result was outstanding. OUTSTANDING. Scooped on top of some fresh pasta and topped off with a dollop of — what else — fresh goat chevre, this dish was made with no prior knowledge of what in the world to do with goat and is now a crowd favorite with the few lucky ducks who joined the table. I challenge you to explore the world of goat meat — it is truly an underappreciated wonder in our American diet. If you want to read more about the No Goat Left Behind initiative watch a great video HERE.

Chop, Saute, Simmer

Chop, Saute, Simmer, Scoop

Ardith Mae Fennel & Goat Ragout

1lb ground goat meat
1 yellow onion, chopped
1 large carrot, chopped
1 celery stalk chopped
1 bulb fennel, chopped — frawns reserved
6 cremini mushrooms, chopped
2-3 TBS olive oil
2 28oz cans diced San Marzano Tomatoes
1 TBS tomato paste.
1 can water
Salt and pepper to taste

1-2 lbs pasta of choice to serve 6-12
1 package fresh goat’s milk chevre {I love Ardith Mae in NY}

  1. Wash and chop all vegetables. Set aside. Chop 1-2 Tablespoons of fennel frawns and save for serving.
  2. Crumble and lightly brown goat meat in a large le creuset or sauce pan. Remove meat from pot and set aside.
  3. Add 2-3 tablespoons of olive oil to the pan and all the chopped vegetables — cook until tender and caramelized. Add tomato paste and stir pot thoroughly. Season with salt and pepper.
  4. Add both cans of tomatoes and one can of water. Bring to a simmer and add meat back to the pot.
  5. Simmer 1-2 hours until sauce has thickened. Taste and add additional salt and pepper, as desired.
  6. Scoop on top of pasta with several dollops of fresh chevre and fennel frawns sprinkled across top. Extra sauce freezes really well for a midweek meal.

Other Meaty Goodness:
Bison, a Better Burger Worth Biting Into
Braised Grass-Fed Beef Brisket and Polenta
Irish Steak & Guinness Puff Pastry Pie

Leave a comment

Filed under @home {recipes to love}

recipe goodness :: grandma dilaura’s veal scaloppine

Grandma DiLaura's Veal Scallopine

Grandma DiLaura’s Veal Scaloppine

I always loved when my grandma made this dish for dinner, but I didn’t realize it left a big impression on people who weren’t part of our immediate family. A few weeks ago I got a request from my dad’s childhood friend, Skip, to publish this recipe. I’ve never met Skip, but I imagine him tagging along behind the younger version of my dad after a few hours of neighborhood baseball. Of course my grandma would have made enough food to feed 17 people, so it was no big deal that Skip would have been asked to pull up a chair and join for dinner — after removing his baseball cap, washing his hands and calling his mother to ask permission, of course.  So this one’s for you Skip!

Vito my Veal Butcher

Vito my Veal Butcher

Step one: find the best butcher in the neighborhood. Preferably one with an old school butcher block, guys in white coats with metal mallets and a man named Vito. For this adventure, we headed up to the best kept Italian secret, Arthur Avenue, and did just that. Ask Vito to get to work hand-slicing each cutlet and pounding it until it’s paper thin and doubled in size. Note to you veal haters out there, you can use chicken but grandma might yell at you.

Veal Assembly

Grandma DiLaura’s Veal Scaloppine

1-2 veal {or chicken} cutlets per person depending on the size
1 plate of flour, seasoned with salt & pepper
2-3 eggs, beaten and seasoned with s&p
1 dish of panko {or regular} breadcrumbs, seasoned with salt & pepper
Vegetable Oil for frying
Salt to season
Lemon wedges
Fresh parsley, chopped

  1. Have your butcher pound each cutlet {or do it yourself if you want to work harder} until 1/4 inch thick and even.
  2. Line up three dishes — one with enough flour to coat both sides of each cutlet, one with beaten eggs and one with enough breadcrumbs to coat both sides of each cutlet. Season each dish with salt and pepper. Note, you can always add more, so start with what looks like just enough.
  3. Work with one cutlet at a time. Designate one hand the dry hand and one hand the wet hand to keep from getting gooey hands. Using the dry hand, add to flour and coat both sides. Shake off excess flour and then add to the egg dish. Picking up with the wet hand, let excess egg drip off and add to the breadcrumbs. Coat both sides using the dry hand and then place on a baking sheet. Repeat to coat each of the cutlets, placing a layer of plastic wrap or waxed paper between each layer of cutlets on the baking sheet.
  4. Using a large, deep skillet pour ~1/2 inch of oil in the pan and bring to medium-high heat. Test when the oil is ready by dropping a bread crumb into the oil at which point you should see bubbles form around the edges as they start sizzling.
  5. Being careful not to over crowd the pan, add 2-3 cutlets at a time and cook until golden brown on one side, ~2-3 minutes. Flip and cook the other side until golden brown, ~2-3 more minutes depending on how high your heat is and how thick each piece is.
  6. Remove from oil and place on a plate or baking sheet lined with paper towel to absorb excess oil. Sprinkle with flaky maldon salt to taste.
  7. Cook remaining cutlets, adding additional oil to the pan and adjusting the temperature as needed.
  8. Serve on a platter with lemon wedges and chopped fresh parsley sprinkled over the top…and a big jug of red wine.
Mangia!

Mangia!

Grandma is the Best Cook in the World:
Secret DiLaura Family Frittata with Sweet Italian Sausage
Grandma’s Italian Wedding Chicken Soup
Homemade Gnocchi and Sauce: Channeling My Italian Grandmother
Violet’s Lemon Cheesecake 

8 Comments

Filed under @home {recipes to love}

recipe goodness :: grandma dilaura’s lemon madeleines


Grandma's Lemon Madeleines

Grandma’s Madeleines

Santa called, he wants a new kind of cookie this year. Yes, we all love sugar cutouts and peanut butter cookies with chocolate kisses —  don’t get me wrong, I love the tradition of knowing those festive favorites will be stacked high on the Christmas table too. But this year everything old is new again, so I’m rethinking the cookie plate.

These lemony Madeleines weren’t necessarily a Christmas tradition in our house, but they were ceremoniously revealed after many Sunday dinners at Grandma’s. After a heaping bowl of gnocchi or a big Sunday roast, she’d shuffle over to her cookie tins {which were never empty} and arrange these delicate little shell-shaped cookies {which might as well be referred to as mini cakes for their delicate sponge} on a plate to await the blessing of decorative powdered sugar. They were divine. Pretty, perfect little pillows of lemony goodness. These will always remind me of my grandma and have become a new tradition in my own kitchen — parting gifts for dinner guests or just comforting treats to accompany a steaming cup of weekend coffee. And so for something that evokes those cherished memories, it seems only fitting that they join the joyous Christmas cookie tray. Enjoy!

Madeleine Tray

Madeleine Tray

Grandma DiLaura Lemon Madeleines

Makes 36 Large or 48 Mini | 350°

3/4 Cup Butter, melted and slightly cooled, plus more for brushing pans
3 Large Eggs
2/3 Cup Sugar
1 tsp Vanilla
1.25 Cups Cake or All-Purpose Flour
1/2 tsp Baking Powder
1/4 tsp Salt
Zest of 1 Lemon
1/3 Cup Shredded Coconut (optional)

  1. In a large bowl, mixer on high, beat eggs until light.
  2. Gradually add vanilla and sugar and continue beating until volume has increased about 4x and is pale and fluffy. Add melted butter.
  3. Sift dry ingredients together and fold with spatula into mixture.
  4. Fold lemon zest and/or coconut.
  5. Brush Madeleine molds with melted butter and scoop mixture into each shell filling about halfway —  careful not to overfill as they will rise like a cake.
  6. Bake 8-10 minutes for Large Madeleines and 6-8 minutes for Mini Madeleine trays until cake is firm to the touch and light gold in color.
  7. Remove from trays and let cool on a wire rack. Store in an airtight container.
  8. Right before serving sprinkle with powdered sugar.
Mini Madeleines

Mini Madeleines

Other Grandma Favorites:
Secret DiLaura Family Frittata with Sweet Italian Sausage
Grandma’s Italian Wedding Chicken Soup
Homemade Gnocchi and Sauce: Channeling My Italian Grandmother
Violet’s Lemon Cheesecake

2 Comments

Filed under @home {recipes to love}

recipe goodness :: homemade soft pretzels and mustard from scratch

Homemade Soft Pretzels

Homemade Soft Pretzels

Fall is the time for wooly sweaters, weekend projects and Oktoberfest. Instead of a typical apple pie pastime, I had my taste buds set on a rather adventurous experiment of making homemade soft pretzels and from-scratch mustard. After grabbing several generously sized bags of mustard powder and whole mustard seeds at Kalustyans, the idea of making my own mustard swelled into making four different kinds — it is my favorite secret ingredient, after all. It also didn’t hurt that my cousin and her beer-brewing fiance were in for the adventure and came bearing homemade suds and the same amount of experimental exuberance.

The result? After tasting a piping hot pretzel from my own oven, dare I say I’ll never buy a pretzel from the corner cart again. As for the mustard — four may have been excessive, but it revealed a few standout favorites which I’ve included below. Each of these Oktoberfest treats was made with relative ease, but you may want to consider making the mustard ahead of time as it will continue to mellow out each day — and at first taste, you {and your nasal passages} will quickly understand why mustard plaster was a treatment for pleurisy back in the day.

Homemade Mustards

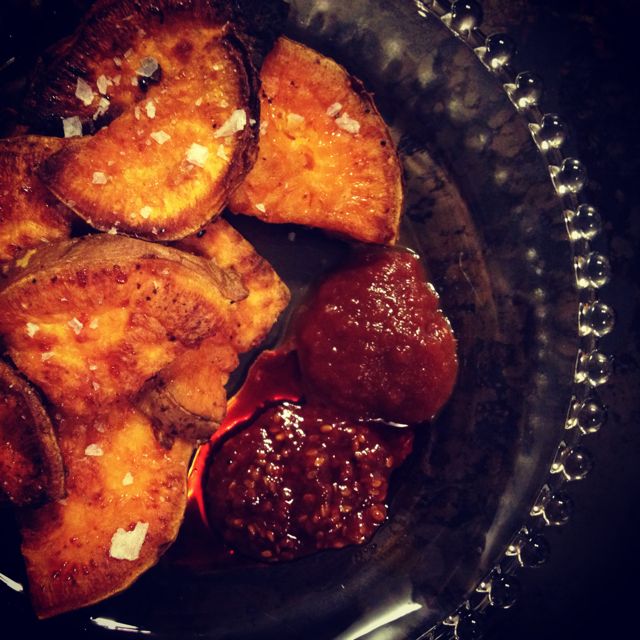
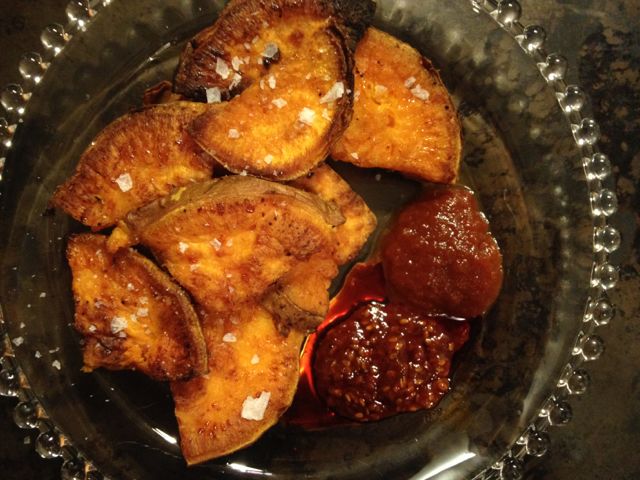
Homemade Mustards (left to right clockwise: coarse rosemary, brown sugar, red wine)

Homemade Soft Pretzels
Recipe From the Fresh Loaf Makes 6 large pretzels — you might as well double it!

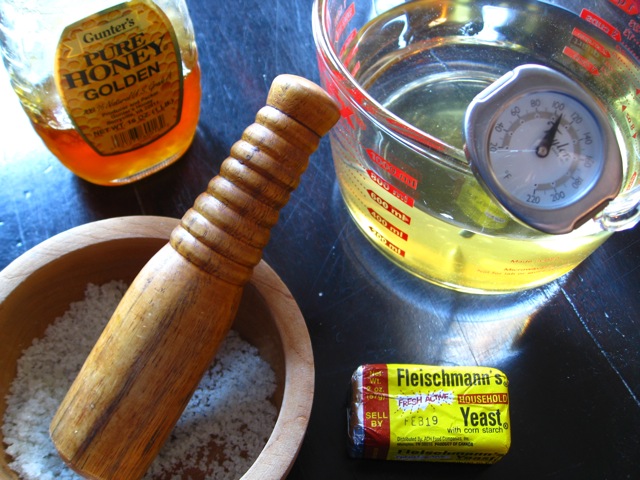
1 teaspoon instant yeast {or bread starter}
1 tablespoon brown sugar
2-3 cups all-purpose unbleached or bread flour
1 teaspoon salt
1 cup warm milk (approximately 110 degrees, which is 1 minute in my microwave)

  1. Combine all of the ingredients in a bowl and mix together until it forms a ball. I start with 2 cups of the flour and mix it together until it forms something like a thick batter, then add more flour a handful at a time until it’ll form a nice ball that I can knead by hand.
  2. Either use an electric mixer to mix the dough for 5 minutes or remove it from the bowl and knead it by hand for 5 to 10 minutes until the dough begins to get smooth and satiny.
  3. Return the ball of dough to a clean, greased bowl, cover with plastic wrap, and set it aside to rise until it has doubled in size, approximately an hour.
  4. Before shaping, start preheating the oven to 425 degrees and bring a large, wide pot of water to a boil.
  5. Roll and rest the pretzel dough

    Roll and rest the pretzel dough

  6. Cut the dough into 6 pieces. Roll each one into a short log, cover with a towel, and let the dough relax for 5 to 10 minutes. After it has relaxed you should be able to roll it out and stretch again fairly easily.
  7. Let them relax again and give each a third roll and stretch session until about 15 inches long and about as big around as your index finger. They’ll nearly double in width while baking, so it is ok to roll them out quite thin.
  8. Place a rope of dough on the work surface in front of you. Take each end in a hand, loop the dough away from you, and bring the ends back toward your stomach, crossing them about an inch above the rope. Apply a little bit of pressure to make the loops stick together, but not too much because you don’t want then to flatten out.
  9. Dunk each of the pretzels into the boiling water for 5 seconds, then place them onto a baking sheet and sprinkle with coarse salt immediately while wet (I use the kosher stuff that is easy to find at the grocery store).
  10. Place the baking sheets into the oven. It took around 15 minutes for my pretzels to get golden and brown. Remove from the oven and eat immediately.
Homemade Fig Mustard

Homemade Fig Mustard

Fig and Port Grainy Mustard (slightly sweet)

½ Tablespoons Brown Mustard Seeds
1½ Tablespoons Yellow Mustard Seeds
½ Teaspoon Kosher Salt
1 ¼ Cup Mustard Powder (not Coleman’s)
1½ Tablespoons Cider Vinegar
1/4 Cup Tawny Port
3 Tablespoons Chilled Fig Simple Syrup (recipe below)

4 Fresh Figs
½ Cup Granulated Sugar
½ Cup Water

  1. Add figs, sugar and water to a small saucepan.
  2. Over medium high heat, stir until sugar dissolves. Continue cooking a few minutes longer until figs become very soft.
  3. Mash the figs into the syrup and keep stirring. Once the figs are well mashed and fully incorporated into the mixture, remove from heat. Pour contents of saucepan through a strainer and remove the large bits of fig.
  4. The syrup that’s left is the fig simple syrup. You can use the fig bits in oatmeal, ice cream or just eat them. You will have syrup left over after making the mustard.
  1. Grind the mustard seeds in a spice or coffee grinder for a few seconds, or in a mortar and pestle. You should leave them pretty chunky (near whole) because you want this to be a grainy mustard…but you could grind them to whatever consistency you like.
  2. Pour the ground mustard seeds into a bowl and add the salt and mustard powder.
  3. Add in the vinegar, port and simple syrup and stir well. Once everything is thoroughly mixed, pour everything into a glass jar (with a lid) and refrigerate.
  4. Wait at least 12 hours before using.
  5. Mustard made this way will last several months if refrigerated in a sealed jar. This recipe makes 1/2 – 3/4 cups of mustard.

Brown Sugar Mustard (#1 crowd fav)

1 cup dry mustard
1/2 cup light brown sugar
1/2 tsp dried marjoram
1 tsp salt
dash cayenne
1/2 cup white vinegar
1/2 cup olive oil

Coarse Rosemary Honey Mustard (a standard whole grain)

½ Tablespoons Brown Mustard Seeds
1½ Tablespoons Yellow Mustard Seeds
½ Teaspoon Rosemary Salt
¾ cup mustard powder
¼-1/2 cup champagne vinegar
2 tbsp honey

Coarse-Ground Red Wine Mustard (packs a red vinegar punch)

1/4 cup white or brown mustard seeds
1/4 cup red wine vinegar
1/4-1/2 cup dry red wine
1/2 cup dry mustard
2 tsps salt
1/4 tsp allspice
2 tbsps cold water

  1. For any of the recipes above, place all the ingredients in a blender or food processor.
  2. Process for 30 seconds, scrape down the sides and process for 30 seconds more.
  3. Add additional liquid if to thick as mustard powder & seeds will absorb more of the liquid.
  4. Put in an airtight container and let stand at room temperature overnight or up to 1-2 days more. The mustard will mellow out in heat over time. Once it reaches desired mildness store in the fridge.

Favorite Dishes with Mustard:
Cumin & Dill Dijon Egg Salad with Radish Sprouts
Roasted Dijon Chicken Salad w/ Dried Cranberries & Sunflower Seeds
Whole-Grain Mustard & Rosemary Pork Chops

Leave a comment

Filed under @home {recipes to love}

recipe goodness :: community grains lazy sunday red flint polenta integrale

A Lazy Polenta

A Lazy Polenta

Well, by the sound of that title it sure does sound like I made something super fancy doesn’t it? Truth is Polenta integrale is the traditional Italian term for ‘whole milled’, meaning the whole corn kernel is coarse-milled together with nothing sifted out, offering a beautiful, rustic texture and hearty, full-flavor that lends itself as the perfect accompaniment to traditional ragús & savory braises, or just butter and cheese.

It just so happens that we’re selling this polenta {quite honestly the best I’ve ever had} in the Food52 Shop. Near extinct, this rare variety of corn was re-discovered in 2000 near the town of Trento in northern Italy. Lucky for us, it is currently in very limited production in the United States.  Here’s the kind of thing you can always have in your pantry and make a lazy, but outstanding Sunday supper out of just about anything you can throw in or on top of it. Polenta is your leftovers friend. And with this whole milled rustic version you’ll transport yourself to nonna’s table with a few stirs of a pot.

Rustic Polenta Integrale

Rustic Polenta Integrale

Lazy Sunday Polenta Integrale
Serves 2-3

1 cup polenta integrale
4 cups water
1 tablespoon butter {optional}
Salt to taste

Toppings or flavor inspiration: 

Rosemary, thyme or any fresh herb, chopped
Chopped red chili for a small kick
Sauteed mushrooms or grated truffles
Sauteed scallion
Leftover pasta sauce or ragu
Leftover grilled vegetables
Dollop of ricotta or goat cheese {let’s be honest, this is a must!}
Grilled or pan seared sausage
A poached egg!
Anything your heart desires

  1. Bring water and polenta to a gentle simmer in a heavy bottomed pot.
  2. Simmer on low for an hour, stirring regularly to prevent sticking on bottom of pot. Add herbs or red chili at this time, if desired. Go read a book.
  3. After an hour cover with a lid and turn heat off to allow polenta to absorb water. Go reorganize your closet.
  4. Add a pat of butter and kosher salt to taste. Stir and bring to a slow simmer to reheat. The consistency should be perfect, but if it’s too thick, add a bit of water to make it easy to stir, but still thick and hearty.
  5. Scoop into a bowl, top with cheese and anything you feel like eating.

Nonna-Worthy:
Homemade Gnocchi and Sauce: Channeling My Italian Grandmother
Homemade Ricotta
How to Cook the Perfect Poached Egg 
Braised Grass-Fed Beef Brisket and Polenta

Leave a comment

Filed under @home {recipes to love}

recipe goodness :: heidi swanson’s harissa spinach chop salad

A few good ingredients

A few good ingredients

I know a few people who would rather leave the lettuce eating to the rabbits. But they like cooked greens — spinach, collards, amaranth greens will all be happily stabbed with a fork and consumed. I also know a few vegetarians who roll their eyes when people suggest all they eat are salads. So when I came across Heidi Swanson’s {a well-known vegetarian cookbook author} recipe for a warm spinach chop, with hard-boiled eggs, garlic, almonds and harissa, not only did my mouth begin to water, but I felt like I discovered a solution to a salad that’s not just another salad.

Everything on this ingredient list I usually have on hand, except the spinach — so it’s an easy last minute menu saver if you can get your hands on some fresh cooking greens. And with the spice of the harissa, the crunch of the almonds, the tartness of the lemon and the substance of the egg, you’ll find this chop combines complex flavors and doesn’t leave you feeling like a peckish rabbit.

Heidi Swanson's Spinach Chop

Heidi Swanson’s Spinach Chop

Heidi Swanson’s Spinach Chop

1 lb. spinach {or other good cooking green — kale, collards}
1 tbs. extra-virgin olive oil
3 cloves garlic, minced
1 tbs. harissa
4 large hard-cooked eggs, peeled and chopped
1/2 cup slivered or whole almonds, toasted
Scant 1/2 tsp. fine-grain sea salt
Grated zest of 1/2 lemon

  1. Remove any tough spinach stems. Add ½-inch water to a pot and bring to a boil.
  2. Add spinach and stir constantly until the spinach collapses entirely, about a minute. Drain spinach and run cold water over it until cool. Spin-dry very well in a salad spinner, or press-dry in a clean kitchen towel.
  3. Finely chop the spinach. Heat oil in a large skillet over medium-high heat. Stir in the garlic and cook for about a minute, without letting it brown. Remove pan from heat and stir in harissa and spinach. Add eggs, almonds, salt, and lemon zest and stir again gently to combine well.
  4. Serve warm or at room temperature.

Stab-Worthy Salads:
Julia Child’s Salade Nicoise
Lime-Kissed Peach and Corn Summer Salad
Orzo, Spinach & Feta Summer Salad
Spinach, Strawberry & Halloumi Salad
Tomato, Basil & Feta Salad
The Ultimate Summer Slaw

1 Comment

Filed under @home {recipes to love}

recipe goodness :: lime-red chili grilled swordfish

Lime-Red Chili Swordfish

Lime-Red Chili Swordfish

The beautiful thing about swordfish is the heartiness of the meat. It’s the perfect grilling fish for someone whose worried about their filet falling through the cracks. And it’s just begging to be topped with a heaping spoonful of some lovely fresh salsa you whipped up — like the smooth spicy tomatillo blend or the bright avocado & peach salsa. I like to marinate it with a little olive oil and the juice of a lime with some red chili and fresh cilantro {or parsley for cilantro haters} just to add a little love to the fish itself. And if you don’t have time for a salsa topper, the marinated fish alone will please a crowd.


Grilled Swordfish with Tomatillo Salsa

Grilled Swordfish with Tomatillo Salsa

Lime-Red Chili Grilled Swordfish

6-8oz fillet per person
1 lime, zested and juiced
Drizzle of olive oil
1/2 red chili chopped
2 sprigs cilantro or parsley chopped
Salt and pepper to taste

  1. Lay the swordfish in a small casserole dish with sides.
  2. Juice, zest, drizzle all the marinade ingredients over the top and turn each fillet to coat.
  3. Cover and let it all hang out in the fridge for as little as 15 minutes or 2-3 hours if you have the time.
  4. Heat a grill to medium heat and cook for 3-4 minutes. Flip and cook for an additional 3-4 or until the fish is cooked through.
  5. Serve as is or with a fresh tomatillo or avocado & peach salsa topper.

Swim with the Fiddies:
Introducing grilled blowfish
Julia Child’s Fillet of Sole Meuniere
Sesame Ginger Lime-Poached Cod
Spicy Balsamic and Fennel Fish Stew

Leave a comment

Filed under @home {recipes to love}

recipe goodness :: grilled zucchini & summer squash pesto “pasta”

Grilled Zucchini & Summer Squash Pesto Pasta

Grilled Zucchini & Summer Squash Pesto Pasta

Summer is a time of agricultural abundance. A stroll through the weekend farmers’ markets is like a rainbow connection — ruby tomatoes, sunshine orange nectarines, golden summer squash, enviously green zucchini, deep purple eggplant. It doesn’t take a lot of effort to take your booty home and make a stellar meal. I’m a proponent of grilling just about anything {I’ve even been known to grill berries} — a little olive oil, salt and pepper is all you need and you can focus on the complexities of your wine paring, not your meal planning.

However, after making a large batch of basil-walnut pesto, I fell compelled to use that precious pairing before it went bad. A likely partner: pasta. But with the mercury rising to high 90s for much of July, a heavy meal was the last thing that appealed to my cravings. Enter zucchini & squash “pasta.” A few swipes of across my mandolin created thin, long strips that mimicked a tagliatelle noodle. Grilling only required enough time to make the squash tender and add some flame flavor. Once done, everything was tossed with the bright herby pesto, a handful of pine nuts for texture and we had ourselves a bowlful of fork twisting goodness.

Grilled Zucchini and Summer Squash

Grilled Zucchini and Summer Squash

Grilled Zucchini & Summer Squash Pesto Pasta

1 zucchini per person
1 summer squash per person
olive oil
salt and pepper to taste
~1 tablespoon pesto per person
~1 tablespoon pine nuts per person

Pesto {makes ~1 cup}:
1 large bunch of basil, leaves only, washed and dried
1-2 cloves of garlic
1/4 cup walnuts or pine nuts {pine nuts are expensive, so walnuts are a nice sub}
1 cup freshly grated Parmesan
A few tablespoons of extra-virgin olive oil

  1. In a food processor add all the ingredients for the pesto and whiz until blended. Taste and add more garlic, nuts or olive oil to your liking and desired consistency.
  2. Pour pesto into an air tight container and cover with a thin layer of olive oil to protect from the air. Cover and store in the fridge or freezer if not immediately using.
  3. Remove the stem from the squash and zucchini and slice thinly lengthwise using a mandolin or sharp knife. Lay on a large baking sheet, drizzle with olive oil and season with salt and pepper.
  4. Grill 1-2 minutes on each side until slightly tender and shows grill marks.
  5. Toss in a bowl with pesto and top with pine nuts.

Grilled Goodness:
Gourmet Grilled White Truffle Corn
Grilled Thyme-Cumin Vegetable Kabobs

Lemon Herb Roasted Chicken
Some Like it HOT Pollo alla Diavola
Bison, a Better Burger Worth Biting Into

1 Comment

Filed under @home {recipes to love}

recipe goodness :: traditional tomatillo tops salsa notions

Traditional Tomatillo Tops Salsa Notions

Traditional Tomatillo Tops Salsa Notions

Each week’s trip the greenmarket feels like a treasure hunt. But despite the many visits I’ve made over the years, I’m still discovering new items that I’ve never cooked with before. This week’s experiment: tomatillos. Luckily my produce stand is manned with friends of Mexican descent, who are more than willing to share their traditional preparation secrets to create a tomatillo salsa that will top any prior notions of what makes salsa good.

First: peel thin outer skin and cook 3 minutes in boiling water until color changes to a darker green.

Side by Side Tomatillos

Side by Side Fresh and Cooked Tomatillos

Second: Toss in the tomatoes and cook for 2 more minutes. Drain. Whiz. Salsa!

Salsafied

Salsafied

Traditional Tomatillo Salsa

4 tomatillos
~2 cups mixed yellow, red and black grape tomatoes
2 stems of cilantro, washed and finely chopped
1/2-1 red chilli {depending on heat pref}
1 scallion or 1/4 medium red onion
salt to taste

  1. Bring a pot of water to a boil with 4-5 inches of water
  2. Peel tomatillo and add for 2 minutes. Add tomatoes and cook for 2-3 more minutes until tender.
  3. Drain and blend thoroughly with onion, red chili and salt to taste.
  4. Mix in chopped cilantro by hand.
  5. Chill or serve immediately as a salsa or topping to fresh grilled fish.

Salsafied:
Creole Roasted Fresh Corn-Tomato Salsa
Avocado & Tropical Fruit Salsa 
Introducing grilled blowfish

2 Comments

Filed under @home {recipes to love}

recipe goodness :: balsamic-drizzled watermelon steak topped with feta, mint and pistachios

Watermelon-Feta Steak

Watermelon-Feta Steak

Every now and then something brilliant hits you over the head and you wish you discovered that genius trick first, patented it and retired to easy living on the shores of a remote caribbean island. I often struggle with slicing the unwieldy watermelon — do I cut it in half first, then slice it into easy-gripping triangles? Do I chop it into neat little cubes for easy bites that don’t require a fork and knife? Is there a *right* way to slice that big bertha? I don’t know the answer to that, but I do know that thanks to my brother’s brilliant find, I recently discovered the simplest plan of attack that, in my opinion, is the most beautiful as well. Simple circles. The result is like cutting into a juicy steak, only sweeter. Doesn’t that plate just make you swoon for summer?!

Simple Slicing

Simple Slicing

Balsamic-Drizzled Watermelon Steak Topped
with Feta, Mint and Pistachios

Serves a watermelon sized party {all ingredients optional}

1 Seedless Watermelon
1/2-1 lb fresh goat’s milk feta  {NYC: Ardith Mae at the greenmarket is the best!}
1 bunch fresh mint, chopped
1/2-1 cup shelled pistachios, chopped
Good aged balsamic for drizzling
Maldon salt to taste

  1. Place the watermelon on its side — if it is more round in shape, slice a thin edge off the rind to create a flat surface that you can lay on the cutting board to avoid rolling.
  2. With a large chef’s knife slice into 1-inch thick circles and set aside.
  3. Lay each circle flat and take a small paring knife to slice around the circle where the melon meets the rind.
  4. Place each melon circle in the center of a plate, top with crumbled feta, chopped mint, chopped pistachios and a drizzle of balsamic. Add flaky salt to taste, if desired {will bring out the sweetness of the melon}.

More Summer Stars:
Fresh Lime-Margarita Marinated Watermelon
Pink Fizzy Lemonade Cocktails Beat the Heat
Avocado & Tropical Fruit Salsa 
Creole Roasted Fresh Corn-Tomato Salsa
Lime-Kissed Peach and Corn Summer Salad
The Ultimate Summer Slaw

6 Comments

Filed under @home {recipes to love}

recipe goodness :: mastering julia child’s fillet of sole meuniere #jc100

Julia Child's Sole Meuniere

Julia Child’s Sole Meuniere

Filet of Sole Meuniere was Julia’s first-ever meal in France.  She described the sole as “a morsel of perfection” and “the most exciting meal” of her life.  It was this simple preparation of sole that inspired  Julia’s 40-year love affair with food and the start of a cooking revolution in America. The dish takes less than ten minutes to prepare and since the filets go for a swim in clarified butter, there is no shortage of rich “French” flavor. Pour yourself a nice glass of chablis and take a petit voyage to France for dinner.

“There is no substitute for the taste of butter in good cooking…” — Julia Child

Sole Meuniere

Fillet of Sole Meunière

Serves 6

6 skinless, boneless sole or other thin fillets
Salt and fresh ground pepper
1/4 cup of flour or so for a plate
4 tablespoons clarified butter
3 tablespoons minced fresh parsley
4-6 tablespoons unsalted butter
1 lemon cut into wedges

  1. Dry the fish, remove and bones, score, trim and lay flat on wax paper.
  2. Dust the fillets with salt and pepper. Just before sauteing drop each fillet into the flour to coat each side, shaking off any excess.
  3. Set the frying pan over high heat and film with 1/16 inch of clarified butter. When the butter is very hot, but not browning, rapidly lay each fillet side by side leaving a little space between each (don’t overcrowd).
  4. Saute 1-2 minutes on both sides, turning carefully so as to not break the fillet. The fish is done when just springy. Immediately remove from the pan to a platter or plates.
  5. Sprinkle each fillet generously with parsley.
  6. Wipe the pan completely clean, set over high heat and melt with new butter until bubbling.
  7. Pour over fillets — the parsley will bubble up nicely. Season with salt, serve with lemon wedges immediately.

Bon appetit!
recipe goodness :: mastering the art of julia child’s salade nicoise
recipe goodness :: mastering julia child’s rolled french omelet
recipe goodness :: mastering the art of julia child’s chocolate mousse
Do This!: Celebrate Julia Child’s 100th Birthday 

Excerpted from The Way to Cook by Julia Child. Copyright © 1989 by Julia Child. Reprinted with permission from the publisher Alfred A. Knopf, a division of Random House, Inc.

2 Comments

Filed under @home {recipes to love}

recipe goodness :: egg on egg salad {introducing bottarga}

egg on egg salad sandwich

egg on egg salad sandwich

Ok this is a totally spectacular way to amp up an otherwise standard mid-week lunch. Egg salad: meet your new friend bottarga, also known as poor man’s caviar. Stop. Keep reading. This is not caviar. Bottarga is a delicacy beloved by those salty Italians, but has been finding its way more recently onto U.S. restaurant menus. Shaved over pasta, pizza and yes, even eggs, this salt-cured, sun-dried mullet roe is the perfect way to add the saltiness of the sea to a dish with very little effort. It comes pressed into a hard form that can be swiped along your microplane to finish a dish like a fine pecorino or can be slid along a mandolin for more decadent paper-thin slices that become a central addition to your plate. Lucky for us there is now an American-produced Cortez bottarga that you can get your hands on from Anna Maria Fish Company.

Egg on egg means business. With a little creamy mayo and peppery dijon to bind the this salad together, all I did was toss in a few radish leaves {no you should not throw those out when you buy radishes — they have amazing flavor!} and green scallions for color and a contrasting herby flavor. Then zested some salty bottarga over top to make this standard lunch truck sammie a true stand-out.

The goods

The egg on egg goods {bottarga lower left}

Egg on Egg Salad

Serves 1

2-3 hard boiled eggs, peeled and  roughly chopped
1/2 tablespoon mayo
1 teaspoon dijon
1/2 small scallion diced {or 2-3 chives}
4-5 radish leaves, washed and julienned
Pepper to taste
Bottarga for grating
Good crusty bread

  1. Roughly chop your eggs. I often remove one of the yolks to cut back on the dry bits.
  2. Toss everything, except the bottarga in a bowl, reserving some scallions for topping later.
  3. Add more of anything you desire, then serve in a bowl or on top of a toasted piece of bread.
  4. Sprinkle with some scallions for giggles and then grate your bottarga across the top, adding as much or as little as your salty italian desires.
  5. Sit down and be amazed by your revamped american favorite.

Other Ways to Jazz Standards:
Blueberry, Lemon & Coconut Pancakes
Herbed Buttermilk Biscuits
Cumin & Dill Dijon Egg Salad with Radish Sprouts
Creole Roasted Fresh Corn-Tomato Salsa

1 Comment

Filed under @home {recipes to love}

recipe goodness :: honey-vanilla pound cake with red bud flowers

honey vanilla pound cake with red bud flowers

After my foraging tour with Leda Meredith, I came back with a handful of edible pink red bud flowers just asking to be made into a sweet dessert. With a little inspiration from Ina Garten’s Back to Basics, her honey vanilla pound cake sounded like the perfect vehicle for my foraged find. This is one of the best pound cakes I’ve ever had — I’ll credit the honey for that. Add this one to the rotation.

Honey Vanilla Pound Cake with Red Bud Flowers
Makes one 8-inch loaf | Slightly adapted from Barefoot Contessa’s Back to Basics

1/2 pound (2 sticks) unsalted butter, at cool room temperature
1 1/4 cups sugar
4 extra-large eggs, at room temperature
2 tablespoons honey
2 teaspoons pure vanilla extract
1 teaspoon grated lemon zest
2 cups sifted cake flower
1 teaspoon kosher salt
1/2 teaspoon baking powder
1/4 cup fresh edible flowers {optional}

  1. Allow butter to sit at room temperature for about 1 hour.
  2. Preheat the oven to 350°. Grease the bottom of an 8 1/2 x 4 1/2 x 2 1/2 inch loaf pan. Line the bottom with parchment paper, then grease and flour the pan.
  3. In the bowl of an electric mixer fitted with the paddle attachment, cream the butter and sugar on medium speed for 3 to 4 minutes, until light.
  4. Meanwhile, put the eggs, honey, vanilla, and lemon zest in a glass measuring cup but do not combine.
  5. With the mixer on medium-low speed, add the egg mixture, one egg at a time, scraping down the bowl and allowing each egg to become incorporated before adding the next egg.
  6. Sift together the flower, salt and baking powder. With the mixer on low speed, add it slowly to the batter until just combined.
  7. Finish mixing the batter with a rubber spatula and fold in flowers {if adding}. Pour into the prepared pan. Smooth the top.
  8. Bake for 50-60 minutes, until a toothpick inserted in the center comes out clean.
  9. Cool for 15 minutes, turn out onto a baking rack and cool completely.
  10. Top with fresh flowers {optional}.

Getting Wild in the Kitchen:
Violet-Radish Spring Salad with Secret Lemon-Garlic Dressing
Wild pokeweed {or Aspargus} and field garlic breakfast tart
   

Homemade Spicy Carrot Kimchi! & Apple Chutney!

4 Comments

Filed under @home {recipes to love}

recipe goodness :: mastering the art of julia child’s salade nicoise #jc100

Julia Child's Salad Nicoise

Julia Child’s Salad Nicoise

This is exactly the type of recipe that you are not meant to follow to a T. A big bowl of fresh ingredient goodness is all that matters. No green beans at the market yet? Asparagus makes for a lovely substitution. Not feelin’ the canned tuna? A beautiful bright tuna filet from my friendly fishmonger Warren at American Seafood was a first class upgrade. And with green garlic in season, I opted for those sweet stalks instead of scallions. I was not really feelin’ the five-page recipe laying out the original steps for Julia’s masterpiece. Really? For a salad? So I skimmed through her instructions and general flavor combinations, made a trip to the greenmarket, did a bit of chopping and doused everything in lemon, olive oil, salt and pepper. The result was a bountiful bowl full of beauty that was both healthy and hearty and will definitely be repeated again. soon. This is the perfect summer evening meal {which a chilled glass of wine of course}.

Julia Child's Salad Nicoise

Julia Child’s Salad Nicoise

“A bountiful arrangement in a bowl or platter is so handsome to behold that I think it a cruel shame to toss everything together in a big mess.”
— Julia Child

Julia Child’s Salade Niçoise {slightly modified}

Serves 2-4 | Link to the original recipe HERE

1 head boston bibb lettuce, washed and dried
1/4 bunch fresh asparagus {or 1 pound green beans} trimmed, cut into 3-inch pieces
1/4 pint grape tomatoes, halved {or 1-2 whole tomatoes cut into wedges}
3/4-1 lb tuna filet grilled and sliced {or 8-10oz  oil packed tuna, drained and flaked)
2-4 hard boiled eggs, halved
1 can flat anchovies packed in oil, drained {optional}
1/4 cup black nicoise-type olives {optional}

Dressing:
1-2 tablespoons capers
1/4 cup minced parsley
1 lemon, juiced
1/2 as much olive oil as lemon
salt and pepper to taste

Potatoes:
4 small new potatoes sliced into circles
1 stem green garlic or scallion, finely diced
1/4 cup potato-cooking water
1 1/2 tablespoons white wine vinegar
2-3 tablespoons fresh parsley
2-3 tablespoons olive oil

  1. Rinse and dry all the vegetables. Add the lettuce to a large bowl while you prepare the rest.
  2. Add eggs to a medium pot and cover with water by 1-inch. Bring to a boil, then turn heat down to a low simmer, cover with a lid and cook for 15 minutes. Remove from heat, remove eggs and cool.
  3. Bring water back up to a boil and add sliced potatoes until just slightly tender when you pierce with a fork. Reserve 1/4 cup of the starchy water, then drain and immediately toss in a bowl with vinegar, scallion/garlic, parsley, olive oil and cooking water. Season with salt and pepper and let potatoes absorb the liquid as they cool.
  4. Bring a medium pot of water back to a boil and add the 3-inch pieces of asparagus {or green beans} to the boiling water, cover and cook 1-2 minutes until bright green, but still firm. Drain and immediately run cold water over or add to an ice bath to stop the cooking process.
  5. Mix the dressing. Pour a little over the cut tomatoes in a small bowl and set aside. Pour a little over the asparagus in a small bowl and set aside. Pour the rest over the lettuce and toss to coat.
  6. Heat your grill to high.
  7. Coat your tuna with olive oil, salt and a generous amount of coarse black pepper on both sides. Cook 3-5 minutes on each side, just until the outer edges turn white and the center is still a light pink for medium rare. Remove from heat and let rest.
  8. Assemble the salad by channeling your inner Julia, creating sections of the seasoned potatoes, tomatoes, asparagus {or green beans}, the egg halves and olives. Sprinkled the anchovies over the salad. Slice the tuna and arrange in the center of the bowl.
  9. Bon Appetit!

More Juuuuuuuulia:
recipe goodness :: mastering julia child’s rolled french omelet
recipe goodness :: mastering the art of julia child’s chocolate mousse
Do This!: Celebrate Julia Child’s 100th Birthday 

Excerpted from The Way to Cook by Julia Child. Copyright © 1989 by Julia Child. Reprinted with permission from the publisher Alfred A. Knopf, a division of Random House, Inc.

2 Comments

Filed under @home {recipes to love}

recipe goodness :: grilled green garlic

Grilled Spring Garlic

Grilled Green Garlic

Springtime brings lots of treasures that are here for a blink of an eye and then gone from our flourishing greenmarkets. Ramps, strawberries, asparagus — just some of the items that get loaded into our resuable shopping bags as we lust over these edible signs of the outdoor dining season. One of my favorite flash finds is green garlic {also known as spring garlic or new garlic}. These long green shoots look a lot like scallions, but are the beginnings of the larger garlic bulb we have come to be more familiar with. When the farmers trim these stalks it makes way for those bulbs to continue growing throughout the season and brings us a mild sweet garlic treat as a bonus. My favorite thing to do is toss them with olive oil, salt and pepper and throw them on the high rack of the grill to slow roast for 10-15 minutes until perfectly tender. They are mild enough to be eaten on their own, but make a killer topping for crostini slathered in ricotta, grilled pizzas, a nice juicy steak or even eggs.

Grilled Green Garlic

1-2 bunches spring garlic
olive oil
salt & pepper

  1. Trim roots and dark green fiberous leaves from garlic stems and slice in half lengthwise.
  2. Toss with olive oil, salt and pepper to coat.
  3. Place on the top rack of the grill with the heat on low and roast until tender and starts to brown.
  4. Serve whole or dice into smaller pieces as a topping.

Green Goddess 
Orzo, Spinach & Feta Summer Salad
Spinach, Strawberry & Halloumi Salad
Tomato, Basil & Feta Salad
The Ultimate Summer Slaw
Grilled Thyme-Cumin Vegetable Kabobs
How to Love a Radish
Violet-Radish Spring Salad with Secret Lemon-Garlic Dressing

4 Comments

Filed under @home {recipes to love}

recipe goodness :: mastering the art of julia child’s chocolate mousse #JC100

Julia Child's Chocolate Mousse Bowls

This is the first recipe I’m sharing from the 100 days of Julia Child celebration.

In the words of Juuuuulia:
among all the recipes for chocolate mousse, this one is the best.

With two sous chefs by my side {thank you KMR and SKW} we masterfully whipped up this mousse in record speed — one on chocolate duty, one on egg creaming duty and the other on dish duty {a lot of bowls got egg on their face with all the separating, creaming, melting, folding that takes place}. While the mousse took a bit of symphonic precision in bringing together several separate movements in perfect timing, we found this recipe to be relatively easy to master as long as you prepare and measure out your ingredients into prep bowls before beginning. The only other recommendation I would make is to test this recipe with less sugar {or bittersweet chocolate instead of semi-sweet}. I have a savory tooth in general, but the crowd concurred that this meal-ender was a little too sweet — chalk that up to the French way of cooking.

Julia Child’s Chocolate Mousse 

Makes 6 small dessert bowls {or 12 if you want to limit your sweet intake}

4 egg yolks separated, whites reserved
3/4 cups sugar {I recommend trying to cut out 1/4 cup}
1/4 cup orange liqueur

6 ounces semi-sweet baking chocolate {or try bittersweet}
4 tablespoons, room temp strong coffee
6 ounces unsalted butter
1/4 cup finely zested or chopped orange peel {optional}

4 egg whites
pinch of sugar

1/2 pint heaving whipping cream
1 teaspoon vanilla extract
fresh in-season berries

  1. Measure everything into prep bowls before beginning to make this multi-step process seamless {especially if you don’t have sous chefs!}
  2. Beat the egg yolks and sugar together until mixture is thick, pale yellow, and falls back upon itself forming a slowly dissolving ribbon. Beat in the orange liqueur.
  3. Then set mixing bowl over the not­ quite simmering water and continue beating for 3 to 4 minutes until the mixture is foamy and too hot for your finger.
  4. Then beat over a cold water pot for 3 to 4 minutes until the mixture is cool and again forms the ribbon. It will have the consistency of mayonnaise.
  5. Melt chocolate with coffee in a separate bowl over hot water. Remove from heat and beat in the butter a bit at a time, to make a smooth cream.
Steps 2-5: Melt and Creaming

Steps 2-5: Melt and Creaming

  1. Beat the chocolate into the egg yolks and sugar, then beat in the optionaì orange peel.
chocolate + butter

chocolate + butter

  1. Beat the egg whites and salt in a separate bowl until soft peaks are formed; sprinkle on the sugar and beat until stiff peaks are formed.
  2. Stir one fourth of the egg whites into the chocolate mixture. Fold in the rest.
  3. Turn into serving dish, dessert cups, or petits pots. Refrigerate for at least 2 hours or overnight.

whip and fold

  1. When ready to serve beat whipping cream and vanilla until thick enough to hold a peak. Serve in a separate bowl. Serve with fresh seasonal berries.
Julia Child's Chocolate Mousse

Julia Child’s Chocolate Mousse

Excerpted from Mastering the Art of French Cooking by Julia Child. Copyright © 1961 by Alfred A. Knopf. Reprinted with permission from the publisher Alfred A. Knopf, a division of Random House, Inc.

Channeling My Inner Juuuuulia:
Do This!: Celebrate Julia Child’s 100th Birthday 

3 Comments

Filed under @home {recipes to love}

recipe goodness :: how to cook dried beans in the rancho gordo manner

Homemade Black Beans

Homemade Black Beans

I’m ashamed to admit I’ve never made dried beans before. People always speak the praises of dried beans — so much more flavor! More economical! But when a can of garbanzos or cannellinis only costs about $1.00 and the only real work required is the pull out the can opener, sometimes it’s hard to convince yourself that the old fashioned method is better when it comes to beans.

Well, I’m a convert. In keeping with my Rancho Gordo Cinco de Mayo fiesta, I decided to make a side of black beans the low and slow way. It’s no longer just about the beans — it’s about all the other things you toss in the pot and let the beans soak up in the process. The result was a depth of flavor and richness that had me convinced I put chocolate in my beans — even though I very well knew I didn’t. If you’re taking the time to make beans a featured side, and can throw a pot on the stove while you go vacuum the house, I recommend giving this method a try — use it for any type of bean your heart desires {they’re good for the ♥ after all!} Save the cans for days you’re in a time crunch.

Cooking Beans in the Rancho Gordo Manner

Serves 2-3 | Soak 4-6 hours | Cook 1-3 hours

1 cup of dried beans {black, pinto, cannellini, love Rancho Gordos!}
2 garlic cloves or spring garlic stems, finely diced
2 scallions, finely diced
2 small carrots, finely diced
2 small celery stalks, finely diced
1 cup of vegetable or chicken broth
water
salt to taste
Other optional seasonings: beer, bay leaves, rosemary {white beans love}, ham bones, smoked turkey legs, bacon.

  1. Rinse beans in cool, fresh water. Cover beans with 2 inches of water and soak 4-6 hours {or overnight before bed}
  2. In a large pot, saute finely chopped onion, celery, carrot and garlic in olive oil until soft.
  3. Add drained beans, stock and cover by at least 1 inch of water.
  4. Bring to a hard boil for five minutes and then reduce to a gentle simmer, cooking 1-3 hours until tender.
  5. Once soft, add salt and enjoy!
  6. Tip from Rancho: do not add acids {tomatoes, vinegar} or sugar until the beans are just tender, as they can toughen the beans.

More Ways to Celebrate All Things Mexican:
Ancho Chili Margarita with Fresh Lime-Orange-Grapefruit Juice
Avocado & Tropical Fruit Salsa
Creole Roasted Fresh Corn-Tomato Salsa
Extra Extra! Oaxaca Revolucion de Taco

3 Comments

Filed under @home {recipes to love}

recipe goodness :: how to love a radish {with sesame ginger lime-poached cod}

How to Love a Radish

The Radish is one of the most under-appreciated vegetables in my opinion. It’s often the last man standing on a veggie platter, the filler in the sad tasteless airplane salads or an ornament carved to serve no other purpose than to decorate a dinner plate.

But what’s not to love about a radish — it’s pink! it’s purple! it’s Chanel red! A radish has a great crunch that can add texture to any dish and has a peppery bite that makes this veg one of the more flavorful fresh ingredients that can completely change a recipe without a lot of fuss. And because it’s hearty, radishes can keep for at least a week if stored properly in an airtight container, so you use them up as time allows.

We are often at a loss of what to do with a radish, other than slice it up into a bowl of greens. Keep this recipe in your back pocket for a vibrant and quick Spring radish slaw that is not only good on its own, but can be the perfect accompaniment to a grilled steak, fish, pork chop or just about anything asking for a punch of flavor {also xoxo on tacos!}

Grilled Ginger Sesame Cod with Radish Slaw

Grilled Ginger Sesame Cod with Radish Slaw

Spring Radish Slaw {on Sesame Ginger Lime-Poached Cod}
Serves 2

6 radishes, thinly sliced
3 scallions, diced
small handful of flat-leaf parsley, chopped
1/2 lime, zested and juiced
sel gris or other coarse salt
pepper to taste

1 x 12-16oz cod filet
1 teaspoon ground ginger
1 teaspoon black sesame seeds
1 teaspoon regular sesame seeds
1/2 lime
olive oil for drizzling
sel gris or other coarse salt
pepper to taste

For the Slaw:

  1. Wash and thinly slice radishes, removing roots and stems. Thinly dice scallions halfway up the dark green stem, discarding the rest and the root. Roughly chop parsley and add everything to a small bowl.
  2. Add the zest and juice of half a lime, a general sprinkle of coarse salt and pepper and toss everything together with your hands, giving it a good squeeze. Set the bowl to the side or place in the fridge if you don’t plan to use it within ~30 minutes. Enjoy as a salad as is, or continue to cook your favorite grilled item and use as a fresh slaw topping.

For the Fish:

  1. Cut a large enough piece of foil to place your fish filet in the center and be able to bring the edges together to create a sealed pouch after prep.
  2. Place your filet in the center and lightly drizzle with olive oil and the juice of half a lime. Bring up the edges of foil slightly if needed to prevent juice for getting all over your counter. Season with salt and pepper.
  3. In a small bowl mix the ginger and sesame seeds and sprinkle over the fish to generously cover. Save any extra for another time.
  4. Bring the edges of the foil together and fold over creating a tight seal, which leaving enough room for air to circulate to poach the fish.
  5. Heat your grill to low and place the foil pouch either directly on the grill or on the rack above, allowing it to cook 10-15 minutes. Check when the timer is down that the fish is completely white — add additional time if needed.
  6. Top your filet with the radish slaw, sprinkle some flaky maldon salt across the top and enjoy!

Summer Grillin’ is Good:
Gourmet Grilled White Truffle Corn
Grilled Thyme-Cumin Vegetable Kabobs

Creative Crowd-Pleasing BBQ’d Pizzas
Bison, a Better Burger Worth Biting Into
Whole-Grain Mustard & Rosemary Pork Chops 

3 Comments

Filed under @home {recipes to love}

recipe goodness :: celebrate cinco de mayo with rancho gordo’s posole rojo!

Rancho Gordo Mexican Posole

Rancho Gordo Mexican Posole

There are more ways to celebrate Cinco de Mayo than with a cold corona and a basket of tortilla chips. After working with the infamous Rancho Gordo owner, Steve Sando, to put together a special Cinco de Mayo deal for the Food52 Shop, I was intrigued by his suggestion to provide people with the makings for a very traditional mexican dish called posole. Has anyone ever seen posole on their local mexican restaurant’s menu? I didn’t think so. The best way to describe it is a cross between a tortilla soup and a mexican chili — only so much better. And if you’re not yet familiar with Rancho Gordo either, get to know this quirky and awesome purveyor of heirloom beans and other specialty products that will knock your sombrero off.

Posole’s core ingredient is hominy, which are dried maize kernels that look like corn on steroids {buy Rancho’s dried  hominy, not the canned gummy stuff you’ll find at the corner bodega}. Layer in his smokey chili powder from New Mexico, fragrant oregano so special that Thomas Keller uses it at Per Se and French Laundry, some shredded chicken and broth,  a whole lot of onions and garlic and you’re on your way to a bowl of festive bueno-ness. BUENO.

There’s no reason Cinco de Mayo can’t be celebrated any day of the week. And if you’re trying this for the first time, you might as well get your hands on Rancho’s special deal for  heirloom bean and the posole goods and get stewin’. Ole!

Hominy Hominy Hominy!

Hominy Hominy Hominy! Say it three times for luck

Oregano Indigo and New Mexican Chili Powder

Oregano Indigo and New Mexican Chili Powder

Rancho Gordo Posole Rojo

Serves 8 | 6-10 hour soak time | 5 hour cook time

1.5 cups uncooked hominy (will become ~5-6 cups)

1 tablespoon olive oil
2 medium white onions, chopped fine
8 cloves of garlic, minced
1/3 cup tomato paste {I used a whole 6oz can}
3 tablespoons Rancho Gordo Chili Powder {yum!}
1 tablespoon Rancho Gordo Oregano Indio {yum yum!}
3 1/2 cups chicken broth
4 cups cooked Rancho Gordo Posole {hominy}
1.5-2 lbs shredded poached chicken
salt and pepper
Garnishes: diced avocado, chopped cilantro, finely chopped onion, queso fresco, thinly sliced radishes, sour cream

  1. Sort and rise posole. Soak 6-10 hours in cold water {put it in a pot before bed and you’re good to go the next day}.
  2. Strain and in a large pot, add the soaked posole, 3-4 quarts of water, and a roughly chopped onion.
  3. Bring to a hard boil for about five minutes, then reduce heat to a gentle simmer for about 3-4 hours. Check around 2-3 hours to make sure enough liquid is still in the pot and add more if needed so pot is not dry. Posole will flower, like popcorn when it’s finished.
  4. Strain and set aside.
  5. Fill a pot large enough to fit chicken breasts in with water and bring to a boil. Once boiling, add chicken breasts and poach for 15-20 minutes until cooked through.
  6. Meanwhile, heat oil in 5-quart or larger pot over medium heat. Add onions and garlic and cook until soft. Add tomato paste, chili powder and oregano, stirring until all ingredients are warmed through and well-mixed.
  7. Add 4 cups water, broth and posole. Freeze any extra posole leftover after roughly measuring.
  8. Bring to a boil and then reduce to a low simmer for about 30 minutes to an hour. Shred the chicken and set aside.
  9. Once the liquid has cooked down a bit, add chicken, stir and then add salt and pepper to taste.
  10. Serve in individual bowls and garnish as desired.
Simmer 'til done

Simmer ’til done.

More Ways to Celebrate All Things Mexican:
Ancho Chili Margarita with Fresh Lime-Orange-Grapefruit Juice
Avocado & Tropical Fruit Salsa
Creole Roasted Fresh Corn-Tomato Salsa
Extra Extra! Oaxaca Revolucion de Taco

Leave a comment

Filed under @home {recipes to love}

recipe goodness :: violet-radish spring salad with secret lemon-garlic dressing

violet-radish spring salad with secret dressing

violet-radish spring salad with secret dressing

Think this is just a pretty salad? Think again — this will change your attitude about boring leafy greens. Radishes are in season. Why do we love them? They’re colorful, crunchy and add a nice peppery bite. Violets are in season. Why do we love them? They’re pretty and you can find them all over public parks, so they’re free! {steer clear of the dog zone and make sure your park doesn’t spray pesticides}. Buy your favorite greens {mine are red mustard greens pictured above, for their slight peppery flavor and pretty purple and green leaves}, toss in a few slices of radishes and edible flowers and you have a kodak-worthy plate. But I’m also going to share a secret dressing with you that will not only make this dish eye-catching, but will put Paul Newman to shame.

I recently finished the book An Everlasting Meal, by Tamar Adler. I’m pretty experimental in the kitchen, but this book changed my outlook on so many things. Adler’s witty and approachable read encourages you to think about ways to extend everything you make in the kitchen. Use leftover roasted vegetables in a tart or omelet. Use stale bread to make toasted crostini or homemade breadcrumbs. Freeze all the ends of your carrots, celery, onions, fennel to make your own stock when you have some chicken bones on hand. Pretty simple, but thinking this way makes leftovers so much more interesting when you recreate a second dish instead of just reaheating what you had yesterday.

My favorite lesson and the recipe for a secret life-changing dressing: use all the pan drippings from a roast chicken to make your next salad dressing. Last week we roasted chicken with garlic, lemon, white wine, olive oil and thyme. After cooking away for 30-40 minutes we had a pan full of the most amazing concentrated flavors — things I would want in a dressing anyway, but normally dumped down the drain. This time, I poured everything straight into a container, tossed it in the fridge and pulled it out a few days later when I was looking for something to pour over my pretty Spring salad. The result: inquiries from the entire table as to where I bought this amazing dressing. Try it next time you roast anything and have some good liquid leftovers. It will change your salad world.

Violet-Radish Spring Salad with Secret Lemon-Garlic Dressing

1-2 radishes per person, sliced
handful of violet flowers and leaves, washed and stems removed
2-3 oz of lettuce leaves of choice per person
Drizzle of your leftover roasted whatever pan-drippings
Flaky Maldon salt and pepper to taste

  1. Rinse and dry all your greens and flowers
  2. Toss the greens in leftover dressing. Sprinkle flowers on top.
  3. Add salt and pepper to taste. ‘nough said.

Spring is in the Air:
Lemon Herb Roasted Chicken {for your dressing!}
Cumin & Dill Dijon Egg Salad with Radish Sprouts

Grilled Thyme-Cumin Vegetable Kabobs
Pistachio-Encrusted Spring Lamb w/ Pickled Red Onions & Cumin Yogurt Sauce 

2 Comments

Filed under @home {recipes to love}

recipe goodness :: wild pokeweed and field garlic breakfast tart

Wild Pokeweed and Field Garlic Breakfast Tart

Wild Pokeweed and Field Garlic Breakfast Tart

After my foraging tour with Leda Meredith through Prospect Park, I came home with a bag full of wild treasures and the conviction that I could turn these “weeds” into something mmmm-inducing. I’ve never trampled through a field before and then thought the greens below my feet would make for a tasty meal {not a common thought for a New Yorker}. But I’ve come a long way after a mere two hours with Leda — and am now emboldened to cook with ingredients found a few feet from a park bench. For those of you who don’t plan to take up foraging anytime soon, or don’t have access to a forage-friendly plot of land, I’ve included suggested recipe substitutions to these wild cousins. And let me just say, this recipe exceeded my wildest expectations — it’s a start-your-morning-right winner.

Field Garlic, Pokeweed Leaves and Shoots

Field Garlic, Pokeweed Leaves and Shoots

Wild Pokeweed and Field Garlic Breakfast Tart
Serves 6-8 | Crust recipe from Tamar Adler’s Everlasting Meal

Rustic Olive Oil Tart Crust:
2  1/2 cups of flour
1/2 cup+ cold water
1/3 cup olive oil
1 teaspoon kosher salt

Tart Filling:
6 farmers’ market large eggs
6-8 pokeweed shoots, chopped {use asparagus as a substitution}
Small handful of garlic shoots, chopped {chives as a substitution}
Olive oil
Salt and pepper to taste
1/2 lemon, juiced
6 oz greek yogurt or labne

  1. Mix all the ingredients for the dough together and separate into two separate balls of dough. Add a little extra cold water at a time if the dough is crumbling and not coming together.
  2. Form each half into a disc shape, wrap in plastic wrap and put in the fridge or freezer to chill while you prepare the greens, about 30-45 minutes.
  3. Rinse all your wild greens thoroughly and remove any dry ends or pieces. Roughly chop the pokeweed stalk and leaves into 1-2 inch pieces. {Note: Pokeweed is best enjoyed early Spring when the plant is a single shoot. Avoid eating with the pokeweed branches out and turns dark magenta as it will become toxic at this stage}.
  4. Finely chop the garlic shoots.
  5. Heat a generous pour of olive oil in a medium saute pan over medium heat cook all the greens until wilted and tender. Remove from the heat and squeeze with lemon, season with salt and pepper. Set aside.
  6. Roll one of the discs on a floured surface to fit the shape of your pan {save the other for another time}. I used a rectangular tart pan, but a pie dish will work too. Press the crust into all the corners of the dish you select so the bottom is completely covered in dough. I had to borrow some more dough from the second disc, so do what you gotta do to make it work for you. You can keep the remaining dough in the freezer for a future midweek tart.
  7. Pierce the dough all over with a fork, then lay a piece of foil loosely over the dough. Place pie weights, dry beans or a smaller glass baking dish on the dough to keep it from rising. Bake in the oven for 20 minutes.
  8. While the dough is baking beat all your eggs in a bowl with half of the yogurt and season with salt and pepper.
  9. Remove the par-baked tart from the oven. Remove the weights and foil and spread the greens across the dough. Pour the egg mixture over the top of the tart and dollop the remaining yogurt evenly spaced on top of all the ingredients.
  10. Bake 20 minutes or until egg is set and firm to the touch.
  11. Sprinkle with Maldon sea salt, slice, serve and thank me later!
Delightful Rustic Olive Oil Tart Crust from Tamar Adler

Delightful Rustic Olive Oil Tart Crust from Tamar Adler

The Simplest Ingredients, Make the Happiest Meals

The Simplest Ingredients, Make the Happiest Meals

Other Eggs-ellent Breakfast Winners:
Secret DiLaura Family Frittata with Sweet Italian Sausage
How To Cook The Perfect Sunny Side-Up Egg
How to Cook the Perfect 8.5 Minute Egg
How to Cook the Perfect Poached Egg {with Ramp Butter!} 

2 Comments

Filed under @home {recipes to love}