Tag Archives: DIY

recipe goodness :: how to make homemade butter

How to Make Homemade Butter

Homemade Butter

Butter is something that is easy to take for granted. Whether to cook with or butter your toast, that lovely yellow cream is something we use almost daily. Yet rarely do we think of it as something we can make ourselves. But man is it easy. And really, really good when you do. Buy the best, local heavy cream you can find, plug in your electric beaters and start schmearing.

Homemade Butter

1 pint heavy cream {I use Grazin’ Angus Acres grass-fed}
Flaky salt to taste {Jacobsen Sea Salt or Maldon}

Optional add-ins: Honey, Thyme, Sage, Rosemary, Orange  or Lemon Zest, Whatever your heart desires

  1. Pour cream in a metal bowl and beat with electric beaters on high until the cream becomes solid and separates from the buttermilk {will become a bright yellow}.
  2. Pour into a cheesecloth-lined strainer with a bowl underneath to catch the liquid and place in the fridge for an hour to allow more of the buttermilk to separate.
  3. On a clean surface or cutting board, press with cold hands or a flexible dough scraper to knead the butter and remove more buttermilk. This is also the time to mix in any flavors if making flavored butter. Sprinkle salt to taste and then form into a ball, roll into a log or press into a container to store if you don’t eat it all right away.
Beat cream until it separates and looks like this

Beat cream until it separates and looks like this

And then strain and knead until it looks like this

And then strain and knead until it looks like this

2 Comments

Filed under @home {recipes to love}

Do This!: Brew Beer, Make Friends


Home brew

Home brew

I’m a girl who likes  projects. But even the idea of brewing my own beer intimidated me. Until I became the proud owner of a Brooklyn Brew Shop beer kit after an auction to raise money for Hurricane Sandy relief. With a Saturday to kill and my cousin Angela and her fiance Ryan here to provide moral support {and expert home-brewer guidance} we got to work.

The tools

The tools

The kit comes with almost everything you need to get started, but I did have to have my own funnel and large fine-mesh strainer on hand. Oh, and the grapefruit peel and honey for the grapefruit honey ale. I was a little perplexed that these two key ingredients where not provided in some dried or packaged form, but since I was still in my citruspalooza mode, I happened to have grapefruit on hand so got over the disappointment quickly. Step 1: sanitize all the equipment with the  sanitizer provided in the kit and then get work.

The Mash

The Mash

The Mash 

  1. Heat 2 quarts (1.9 liters) of water to 160°F.
  2. Add grain (This is called “mashing in.” Take note of jargon. Or don’t).
  3. Mix gently with spoon or spatula until mash has consistency of oatmeal. Add water if too dry or hot. Temperature will drop to ~150°F (66°C).
  4. Cook for 60 minutes at 144-152°F (63-68°C). Stir every 10 minutes, and use your thermometer to take temperature readings from multiple locations.
  5. You likely don’t need to apply heat constantly. Get it up to temperature, then turn the heat off. Monitor, stir, and adjust accordingly to keep in range.
  6. After 60 minutes, heat to 170°F (77°C) while stirring constantly (“Mashing Out”).
The Sparge

The Sparge

The Sparge 

  1. Heat additional 4 quarts (3.8 liters) of water to 170°F (77°C).
  2. Set up your “lauter tun” (a strainer over a pot).
  3. Carefully add the hot grain mash to the strainer, collecting the liquid that passes through.
  4. This liquid is called “wort” (pronounced “wert”). It will be your beer.
  5. Slowly and evenly pour 170°F (77°C) water over the mash to extract the grain’s sugars.
  6. You want to collect 5 quarts (4.75 liters) of wort. You will lose about 20% to evaporation later on, so you want to start with a bit more than you’ll end with.
  7. Re-circulate wort through grain once.


The Boil

The Boil

The Boil 

  1. In a pot, heat wort until it boils.
  2. Keep boiling until you’ve hit the “hot break” (Wort will foam – you may need to reduce heat slightly so it doesn’t boil over.)
  3. Stir occasionally. All you want is a light boil – too hot and you lose fermentable sugars and volume.
  4. The boil will last 60 minutes. Start your timer and add in the rest of the ingredients at these times: Add Columbus Hops at start of boil.
  5. Add 1/2 Cascade Hops 30 minutes into boil.
  6. Add remaining Cascade Hops and Grapefruit Peels 55 minutes into boil.
  7. At 60 minutes turn off heat. Dissolve 1/4 cup Honey and Candi Sugar.
  8. Twenty percent of the wort will have evaporated in this step leaving you with 1 gallon (3.8 liters) of wort. If your boil was a bit high, the surface area of your pot extra large, or you brewed on a really hot day, you may have less than the full amount. Don’t worry – you just reduced your beer a bit too much, but you can add more water in the next step.
The Fermentation

The Fermentation

Fermentation 

  1. Place brew pot in an ice bath until it cools to 70°F (21°C).
  2. Once cooled, place strainer over funnel and pour your beer into the glass fermenter. Yeast needs oxygen. The strainer helps aerate your wort and clarify your beer (as well as catch any sediment from going into the fermenter). Add tap water to bring wort up to 1 Gallon mark if level is low.
  3. “Pitch” yeast. (Toss the whole packet in.)
  4. Shake aggressively. You’re basically waking up the yeast and getting more air into the wort.
  5. Attach sanitized screw-top stopper to bottle. Slide rubber tubing no more than 1” (2.5 cm) into the stopper and place the other end in small bowl of sanitizer. You’ve just made a “blow-off tube”. It allows CO2 to escape.
  6. Let sit for two or three days or until vigorous bubbling subsides. This is when fermentation is highest. You may notice bubbles and foam at the top of the beer. After bubbling calms down, clean tubing and ready your airlock.
  7. Sanitize, then re-assemble airlock, filling up to line with sanitizer.
  8. Insert airlock into hole in stopper.
  9. Keep in a dark place for two weeks without disturbing other than to show off to friends. (If beer is still bubbling, leave sitting until it stops.)
  10. In the meantime, drink beer with self-closing swing tops, or ask for empties at a bar that has some. If you have a bottle capper and caps, you can save two six packs of non-twistoff beers instead.
Bottling

Bottling

Two Weeks Later: Bottling 

  1. Thoroughly rinse bottles with water, removing any sediment.
  2. Mix remaining sanitizer with water.
  3. Fill each bottle with a little sanitizer and shake. Empty after two minutes, rinse with cold water and dry upside down.
  4. Dissolve 3 tablespoons honey with 1/2 cup water. Pour into a sanitized pot. You will be siphoning your beer into the same pot in the next steps. Carbonation comes from adding sugar when bottling, so if you filled your jug with less than the full gallon in the last step, use less honey when bottling. Using the full amount can result in your beer being over-carbonated.
  5. Siphoning (It all happens pretty fast. You may want to practice on a pot of water a few times.) To see it in action first, watch the How to Bottle video at brooklynbrewshop.com/instructions.
    1. Attach open tubing clamp to tubing.
    2. Fill tubing with sanitizer.
    3. Attach sanitized tubing to the short curved end of your sanitized racking cane. Attach the black tip to the other end – it will help prevent sediment from getting sucked up. It will probably be a snug fit, but you can get it on there.
    4. Pinch tubing clamp closed.
    5. Remove screw-cap stopper and place racking cane into jug, just above the sediment at the bottom (“trub”).
    6. Lower end of tubing not connected to racking cane into sink. Suction will force beer up and through the racking cane and tubing. Open tubing clamp, let sanitizer flow into sink until beer just starts to flow out of the tubing, then clamp shut. Open clamp on tubing, allowing beer to flow into pot with sugar solution. Tilt jug when beer level is getting low, but be careful in not sucking up the trub.
  6. Siphon beer from pot into bottles, pinching tube clamp to stop flow after each bottle.
  7. Close bottles.
  8. Store in a dark place for 2 weeks.

Two Weeks Later: Enjoying and Making Friends

  1. Put beers in the fridge the night before you drink them.
  2. Drink. Share with friends if you’re the sharing type. Or barter for fresh river trout {more on that later}

MORE SCRATCH PROJECTS {get back to your roots}

CHEESEHomemade Fresh Mozzarella
CHEESEHomemade Ricotta
BREAD101: How to Make Bakery Quality Bread @Home
MUSTARD & PRETZELSHomemade Soft Pretzels and Mustard

PICKLESHomemade Spicy Pickled Carrots
KIMCHIHomemade Spicy Carrot Kimchi! & Apple Chutney!

1 Comment

Filed under @home {recipes to love}, Do This!

recipe goodness :: how to make mama proud & homemade fresh mozzarella

Let me start by saying this was shockingly easy and a lot of fun. It was perhaps made easier by the Roaring Brook Dairy Mozzarella Cheesemaking Kit that my brother gave me for Christmas. The kit comes with everything you need, including the gloves and thermometer, but most importantly the few specialty items required for cheesemaking {citric acid, rennet}. Now that I have stretched my homemade curd skills, these are things I plan to stock up on so I can continue to make the mozz monday, tuesday, thursday.

Homemade Fresh Mozzarella

Ingredients:
1 gallon pasteurized whole milk {not organic or ultra-pasteurized}
1.5 teaspoon citric acid
1/4 rennet tablet
1 teaspoon salt {or more to taste}
1 1/4 cup chorine-free filtered/spring water, divided

Equipment:
Thermometer
Rubber gloves
Measuring spoons
Strong slotted spoon {this is a great one}
Microwave safe mixing bowl
Colander
1-gallon stainless steal or non-aluminum pot

PREPARATION:

  1. Wash your hands and make sure all equipment is completely sterilized and clean {a run through the dishwasher is a good way to do this to eliminate an dirt or dust that may impact the curd}.
  2. Have a timer near your stove.
  3. Prepare the rennet water solution by dissolving 1/4 tablet of rennet in 1/4 cup of cold chlorine-free water {not tap water and if you buy bottled, be sure to buy spring-sourced}. Set aside. Wrap the remaining pieces of tablet and store in freezer for future use.
  4. Measure 1.5 teaspoons of citric acid into 1 cup of cold chlorine-free water. Stir to dissolve completely and set aside.

HEATING THE MILK:

  1. Pour the milk in the pot.
  2. Heat the milk over a medium-low flame {about 10 minutes}. Using the thermometer, check the temperature. At 85° F, add the citric acid. Stir with a slotted spoon or whisk slowly for 20 seconds.
  3. When milk reaches 100° F {about 5 minutes}, stir in the rennet-water solution and add to the milk. Using a slotted spoon gently stir the milk in an up and down motion for approximately 30 seconds.
Step 1-Heating the Milk

Step 1-Heating the Milk

DEVELOPING THE CURDS:

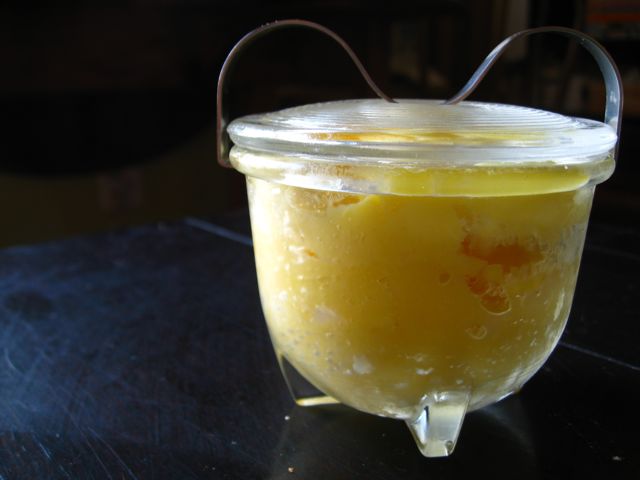
  1. Heat the milk a little more to 105° F and then turn the heat off. Cover the pot and let sit for 10 minutes. You should see signs of coagulation. The curds {the white mass} should look shiny and being to pull away from the side of the pot. The whey {liquid} should look like it has a yellow tint to it.
  2. To check if the curds are ready gently press the back of a spoon into the curds. If it leaves a dent, the curds are ready. If it does not, allow the curds to sit for another 2 minutes.
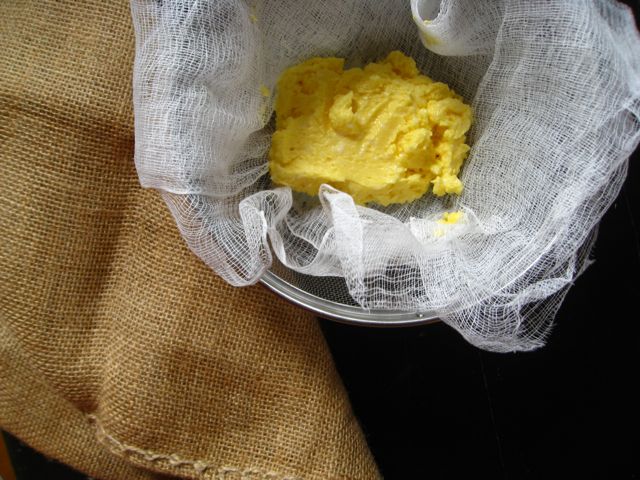
Step 2-Develop the CurdsDRAINING THE CURDS:

  1. The goal is to drain as much whey as possible from the curds while handling gently.
  2. Place the colander over a large microwaveable bowl.
  3. Using a slotted spoon, gently lift up the curds and let the whey drip back into the pot. Then place the curds in the colander.
  4. When all the curds are in the colander, gently press the curds with the palm of your hand to push out as much whey as possible. When there is almost no whey coming out of the curds place the curds in an empty microwaveable bowl.
  5. Again, using the palms of your hands, press down gently on curds and remove as much whey as possible.
  6. You can save the whey for Homemade Spicy Carrot Kimchi! & Apple Chutney!.

Step 3-Draining the CurdsCOOKING AND KNEADING THE CURDS:

  1. Microwave the curds for 1 minute.
  2. Put on a pair of rubber gloves to protect your hands from the heat. Remove the bowl of curds. Drain any whey and then gently fold the curds over to distribute the heat. Continue to drain out any whey.
  3. Microwave the curds for an additional 30 seconds. Drain and kneed the curds again. Knead the curds until it begins to look smooth, shiny and is firming up.

Step 4-Cooking and Kneading the Curds.jpg

STRETCHING THE CHEESE:

  1. Take the temperature of the cheese. It must be 135° F to stretch properly. If it isn’t hot enough, microwave for another 30 seconds until the cheese reaches temperature. Add the salt and any other herbs you want to use and begin to work into the cheese by stretching and folding, and repeat this movement.
  2. Holding the cheese up, let it fall on itself. If you prefer a softer texture, don’t stretch the cheese as much. As soon as it is smooth and shiny {looks like taffy} shape it into a ball.
  3. Form ball by pulling and tucking the edges underneath the cheese and smoothing the top and sides. If you want to eat it warm, just wrap it tightly in plastic wrap. Or, if you want to keep the shape, place each ball in a large bowl of ice water for 15 minutes.
  4. Remove from water, wrap in plastic wrap and refrigerate.
Step 5-Stretching the Mozz

Step 5-Stretching the Mozz

Fresh Mozz!

Fresh Mozz!

Get Back to Your Roots | More Scratch Projects:

CHEESE | Homemade Ricotta
BREAD | 101: How to Make Bakery Quality Bread @Home
PICKLES | Homemade Spicy Pickled Carrots
KIMCHI | Homemade Spicy Carrot Kimchi! & Apple Chutney!

4 Comments

Filed under @home {recipes to love}